Ask out loud. Watch it draw.
AVNI is a Mac app you talk to. It answers like a well-read friend, and when an idea is easier to see than to hear, it draws it on your screen while it explains.
Download AVNI for MacFree during the pilot. Needs a Mac with Apple silicon (M1 or later) and macOS 15 or later.
On Windows? Join the waiting list
Show me why the Pythagorean theorem works.
Set up AVNI in about five minutes
You need your Google account and about 900 MB of space for AVNI's Listener and Speaker. Follow these steps in order; each one shows what you will see.
-
Download AVNI
Click Download AVNI for Mac. Your browser saves AVNI.dmg to your Downloads folder.
Open it from Downloads (or the arrow in your browser's toolbar).
 AVNI.dmgDownloads
-
Drag AVNI into Applications
A window opens with AVNI on the left and your Applications folder on the right. Drag the AVNI icon onto the folder.
Then open your Applications folder and double-click AVNI.
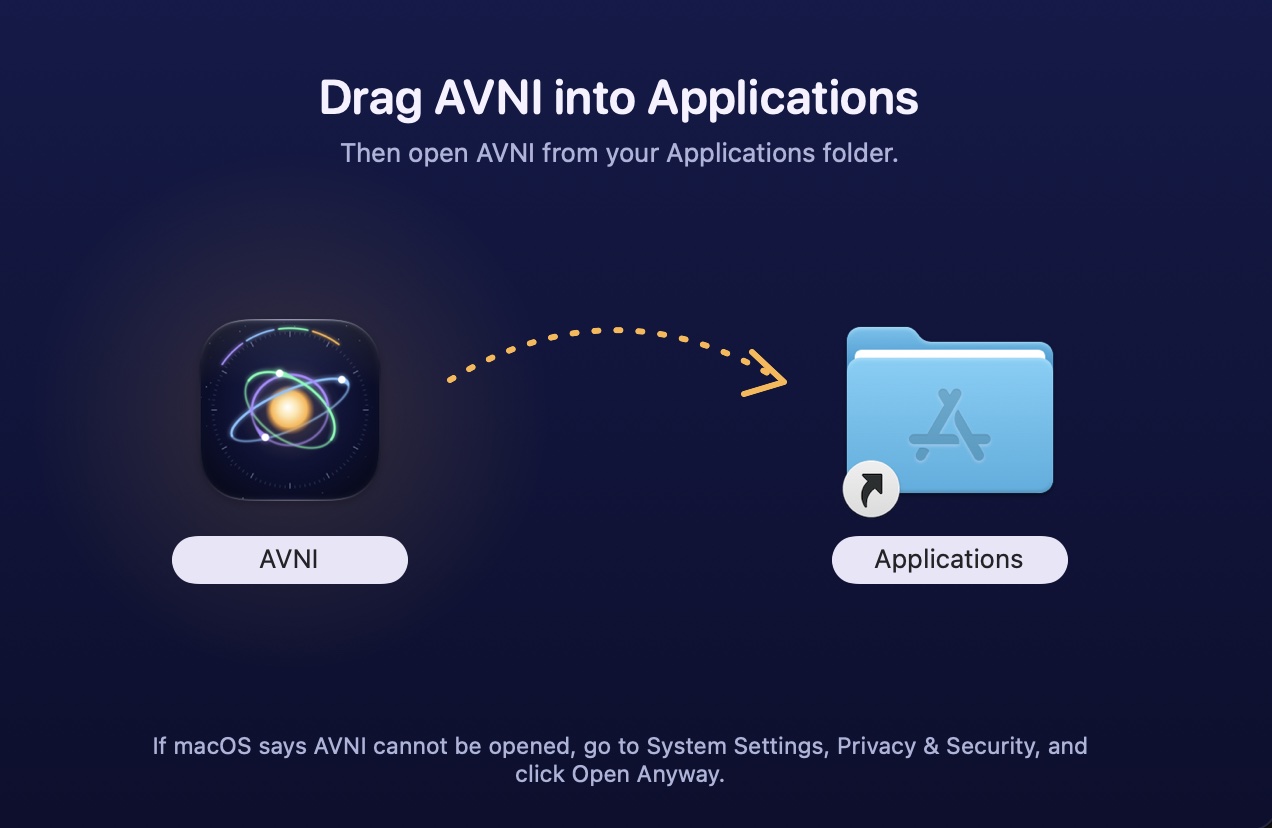
-
Let macOS open it
AVNI is new, so the first time macOS may stop it with a message that it could not verify AVNI. That is expected during the pilot.
- Click Done in that message.
- Open System Settings, then Privacy & Security.
- Scroll down to the line about AVNI and click Open Anyway, then enter your Mac password.
- Click Open Anyway once more when macOS asks. You only do this once.
“AVNI” Not Opened
Apple could not verify “AVNI” is free of malware that may harm your Mac or compromise your privacy.
DoneMove to TrashSystem Settings › Privacy & Security › Security“AVNI” was blocked to protect your Mac.Open AnywayDrawings of what macOS shows. Your Mac's windows may look slightly different. -
Follow AVNI's setup
AVNI opens a setup window that walks you through four short steps:
- Sign in with Google.
- Voice: download AVNI's Listener (it hears you) and Speaker (its voice) once, about 890 MB. Both run on your Mac. You can also add the Thinker (2.4 GB) to answer on your Mac without internet; otherwise AVNI Cloud answers.
- fn key: click Open System Settings, turn on AVNI under Input Monitoring, then click Reopen AVNI.
- Try it and you're done.
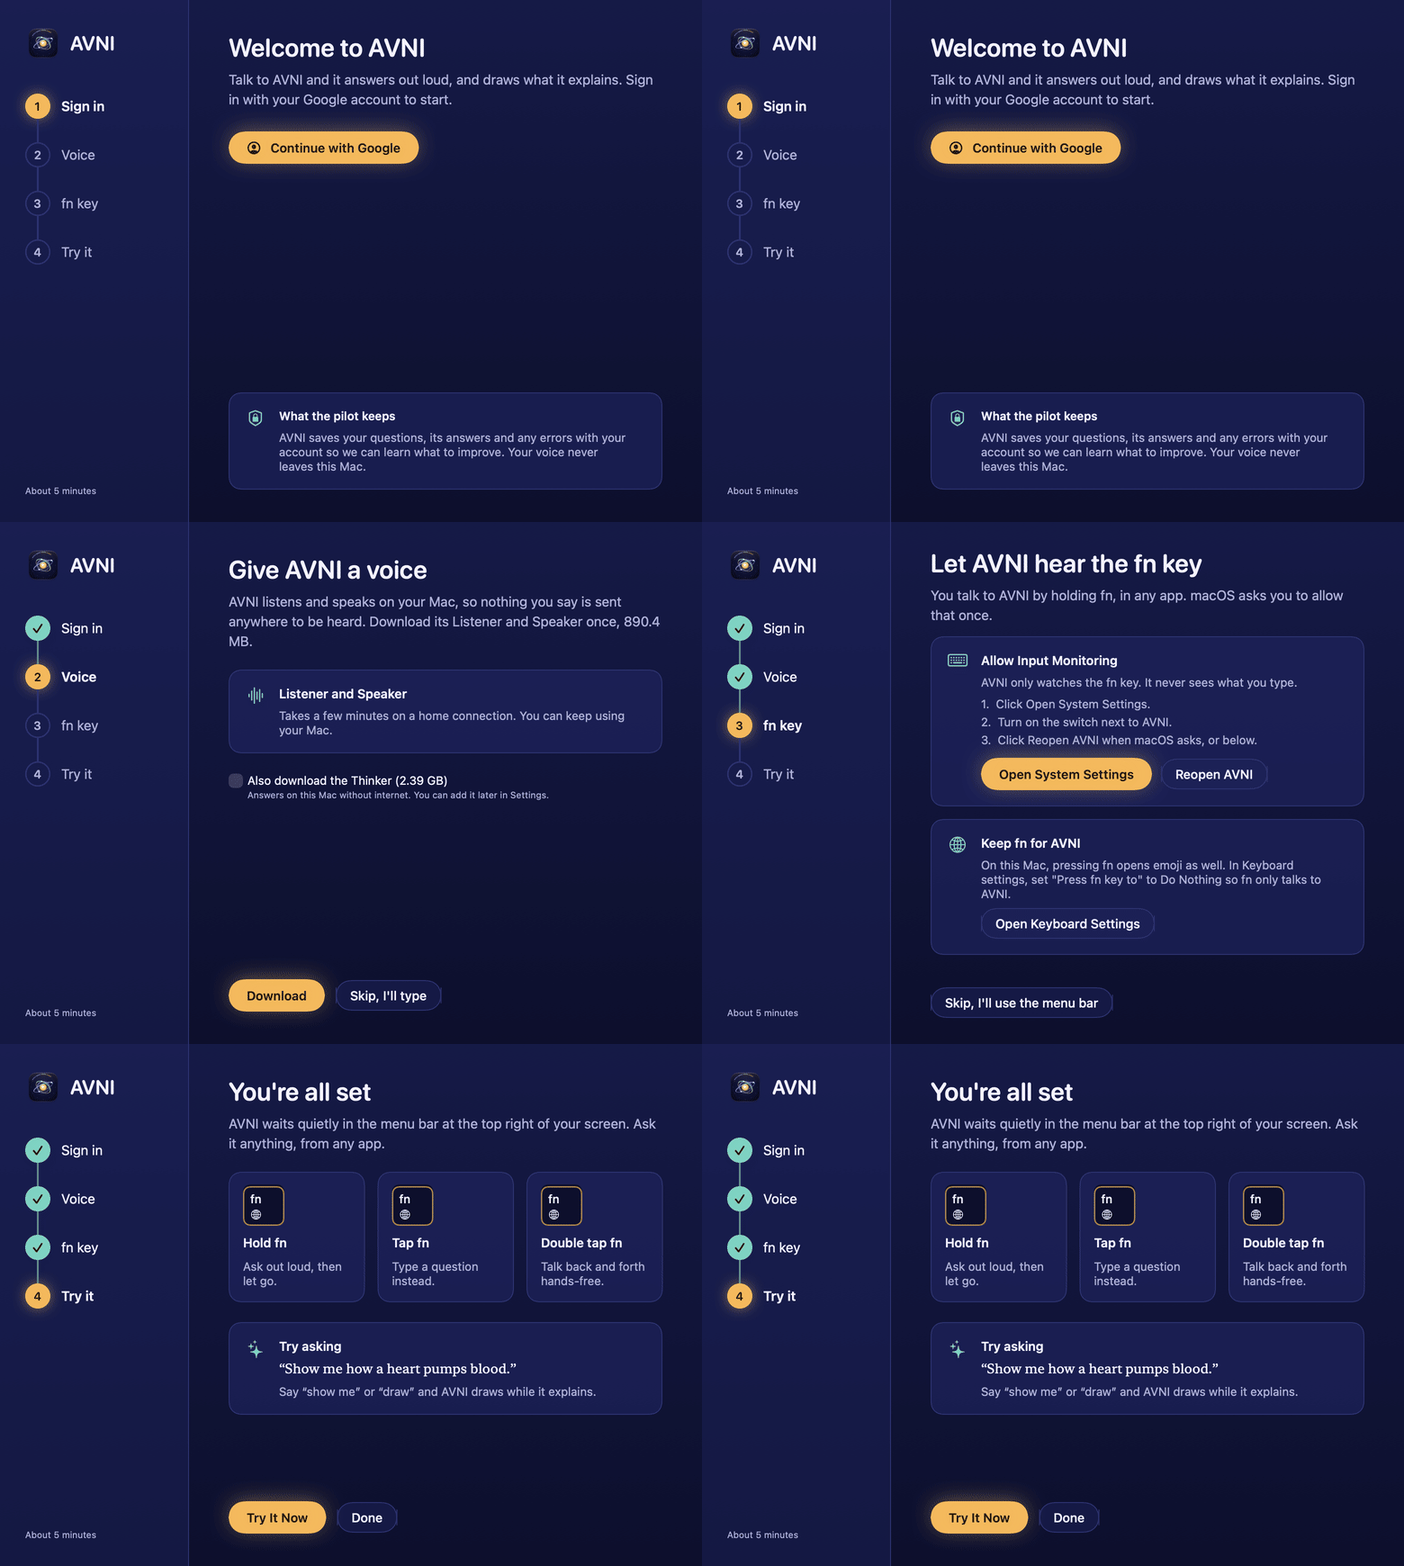
The setup window, step by step. -
Hold fn and ask
AVNI waits in the menu bar at the top right of your screen. From any app:
Hold fnAsk out loud, then let go.Tap fnType a question instead.Double tap fnTalk back and forth, hands-free.
If something goes wrong
- macOS says AVNI can't be opened
- Go to System Settings, Privacy & Security and click Open Anyway (step 3).
- Holding fn opens emoji or dictation
- In System Settings, Keyboard, set “Press fn key to” to Do Nothing. AVNI's setup has a button for this.
- Holding fn does nothing
- Check AVNI is on under System Settings, Privacy & Security, Input Monitoring, then quit and reopen AVNI.
- I closed the setup window
- Click AVNI's icon in the menu bar and choose Setup.
What AVNI keeps
AVNI's Listener and Speaker run on your Mac, so your voice never leaves it. During the pilot AVNI saves your questions, its answers and any errors with your account so we can learn what to improve. Read the privacy policy.
Updates
AVNI checks for updates every day and installs them for you. You can also choose Check for Updates from its menu.